
We all know that one person.
You know, the one who is always talking about themselves.
That’s not cool.
In fact, it can be kind of annoying.
Not only in real life, but on social media as well.
So why is that a common strategy for a large amount of social media accounts?
I’m not sure, but there’s an easy way to balance your social media posts so that you don’t come across this way in your social media accounts.
Curating Content For Social Media
You might have heard about curating content for social media. And chances are that you’re using UpContent to help with it.
If you’re not curating for social media, there’s never been an easier (or better time) to start.
Just so we are all on the same page, curating content is the process of finding other relevant content created by others to share with your audience.
With so many blogs online, there’s no shortage of great content to pick from.
There are a number of ways you can curate content. Among some of my favorite ways are:
- Using search on Twitter, Facebook, or LinkedIn
- Keeping tabs on the newsletters I am subscribed to for relevant content worth sharing
- Sharing expert roundups that I have been mentioned in
- Using articles where I have been linked to or mentioned
As you can see, there’s no shortage of options for gathering content to share.
Sharing Curated Content on Social Media
It’s a pretty straight forward process to share curated content on social media. One way is to simply use the title of the blog post you are sharing and link to it.
Another way is to provide some thoughts about the post you are sharing.
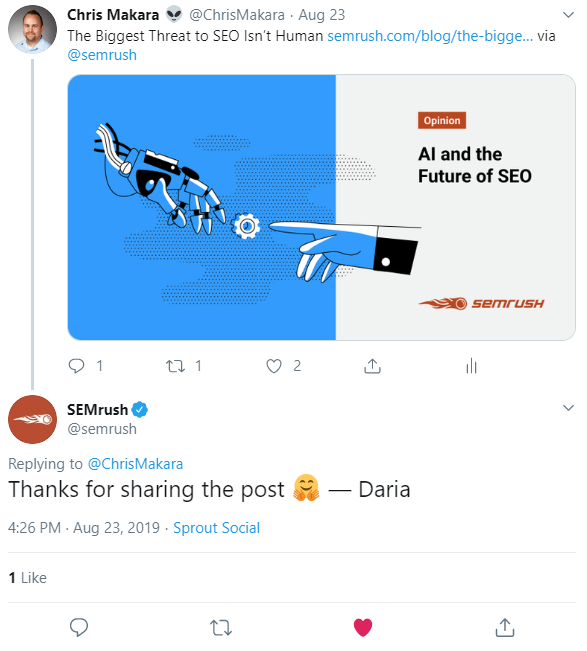
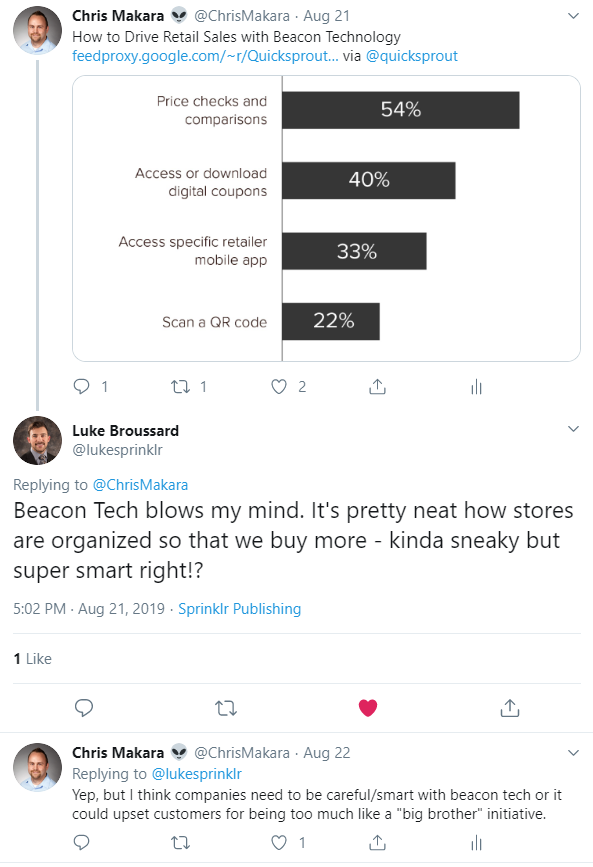
One thing I like to do (especially on Twitter) is to tag the Twitter handle of the person or site I am tweeting about. This has a number of benefits, not only does the person get notified but you also show your audience you are a source of sharing relevant content.
Here’s an example where I tagged SEMrush in a tweet and they thanked me.
Not only is sharing other people’s content on social media a great way to build relationships, it’s also perfect for helping your audience get introduced to a new site, a new idea, or even a new person.
In the end, it helps to position yourself as a leader in your topic and generate a conversation.
Social media is a great way to stay top of mind in your audience. However, if you aren’t continuously sharing with them, you’ll lose out on staying relevant in their social stream.
But when you have content to share, it helps solve the issue of not having anything to share other than your own content.
So what does the typical process for sharing curated content look like?
- Scour social networks, your inbox and other sources for content to share
- Manually add and schedule the content in your favorite social media scheduling platform
- Repeat the manual process
I know what you’re thinking…”This sounds great and all, but surely there has to be a more efficient way to do this”.
And you’re right.
Who Said You Can Only Share Something Once on Social Media?
I’m not sure why some feel that you can only share something once on social media?
Sure, you don’t want to share the same thing again and again in a short amount of time, but if you’re not sharing updates more than once you could be missing out.
In fact, according to this Buffer post they found that each reshare on Twitter resulted in 75% more traffic each time they reshared content previously posted.
There are additional benefits besides more traffic when you share something again on social media. For example, you are able to post across multiple time zones and a better chance to reach your followers since they might not have seen your post the first time you posted it.
While you can share the headline of the blog post multiple times, there are easy things you can do to mix it up while still sharing the same URL.
A few things you can do:
- Use the subheadings from the blog post as the text for your social media update
- Take stats that were referenced in the post and phrase it as a “Did you know that…” status update
- If your blog post quotes someone, you could use their quote as your social update
As you can see, there are multiple benefits and ways you can share the same thing again on social media.
[Pro Tip] The Easiest Way To Automate Your Curated Content on Social Media
Here’s the deal.
We only have 24 hours in a day.
And chances are you don’t want to be constantly finding something to share on social media each and everyday.
You’ve got better (and hopefully important) things to do with your time.
So how can you do more with less?
Automation.
Here’s how to do it...
You know that UpContent is the perfect place to find awesome content to share on your social media accounts.
But here’s the deal, up until now you have been only sharing each piece of content a single time.
I’m going to show you how with just 5 minutes of your time you can build out a library of social media updates AND automatically share them again and again.
You’ll never have to manually schedule evergreen social media updates again (unless you are into that).
Here’s what you will need:
- UpContent account
- Buffer account
- Bulkly account
If you’re not familiar with Buffer, it’s a social media scheduling platform. Basically you manually add you social media updates into your Buffer account and then Buffer will publish them according to the schedule you have set up.
Bulkly is a social media tool that connects to your Buffer account. Once connected, Bulkly will automatically drip social media updates into your Buffer account for you - removing the tedious and manual process of scheduling social media updates.
Step 1: Build Out Your Social Media Update Collection
One of the great features of UpContent is that you can create collections of content.
For example, let’s say you want to share content with your audiences about “Social Media Marketing”.
The first thing you’ll need to do is login to your UpContent account. From there, you will need to create a “Collection” and add content to it.
If you’re not familiar with “Collections” on UpContent, it’s basically a place for you to save select content you find in UpContent.
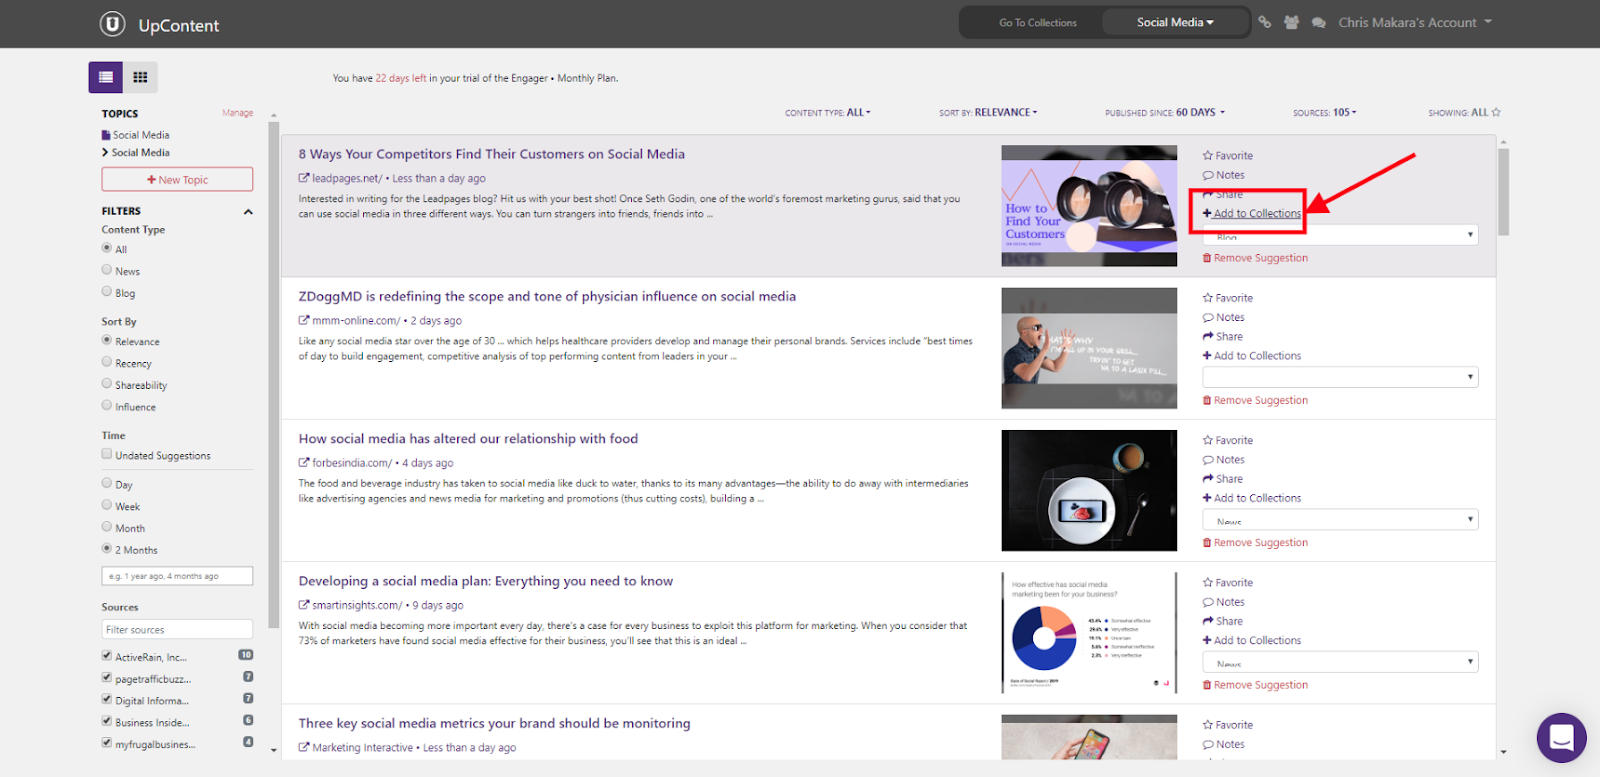
For example, if I wanted to create a collection of social media topics, I would create a collection and then as I am searching and browsing in UpContent I click “Add to Collection” for each piece of content I want to add.
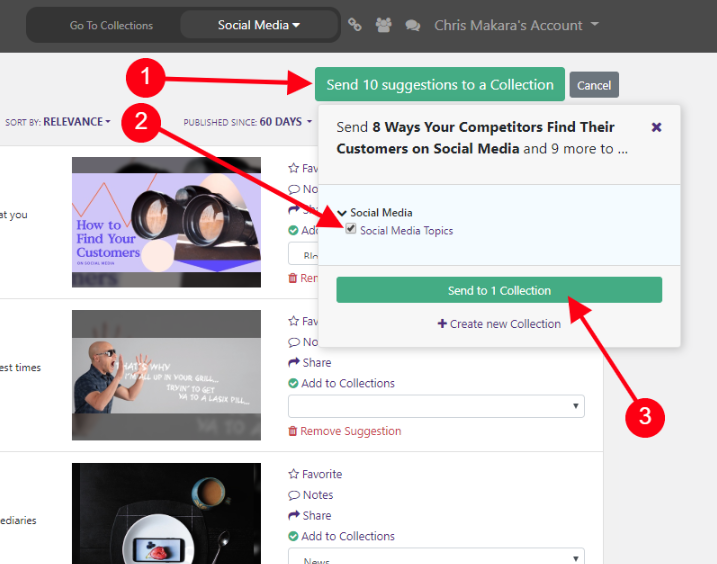
Once you have found the content you want to add to the collection, click on the “Send X suggestions to a Collection” button, choose the collection, and then click “Send to Collection”.
And over time, you can always add more content into this collection.
The strategy for selecting content is that it should be evergreen in nature. This means that there’s little chance it will be irrelevant in the next year or two.
This is key for being able to share the same content again and again.
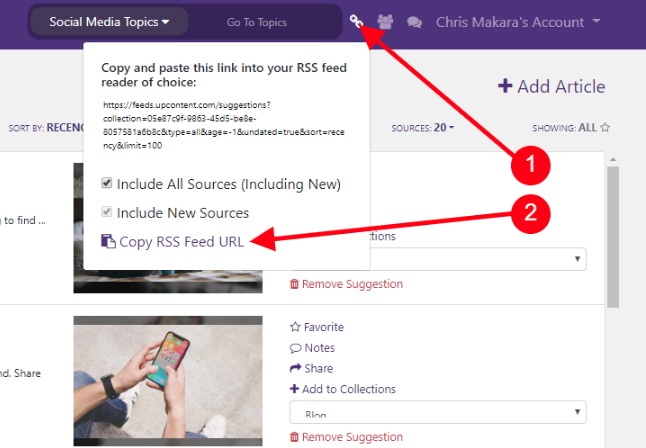
After you have added some content to your collection, you will need to get the RSS feed URL for your collection.
This is what is going to help feed Bulkly and ultimately Buffer with your evergreen content for social media updates.
To find your collection RSS feed, go to your collections page and click on the link icon, then click on the “Copy RSS Feed URL”.
Step 2: Create Accounts on Buffer & Bulkly
Up next you will need to create a Buffer account if you don’t already have one. They have a wide range of options from free to $99/month.
Once you have a Buffer account, the last piece of the puzzle is to create an account on Bulkly.
Bulkly has several options starting at $12/month with all plans offering a free 7 day trial.
Part of the setup process on Bulkly is that you have to connect your Buffer account to Bulkly - so it’s important you already have a Buffer account when signing up on Bulkly.
Step 3: Setup Automation to Post Your Curated Content
There are several ways Bulkly can add content automatically to your Buffer account. And one way is through RSS feeds.
In Bulkly, here’s what you need to do:
- Click on the “RSS Automation” link in the left menu
- Then click on the “Add RSS Feed Online”
- In the overlay, paste in the RSS URL you copied earlier from UpContent
- Click Save
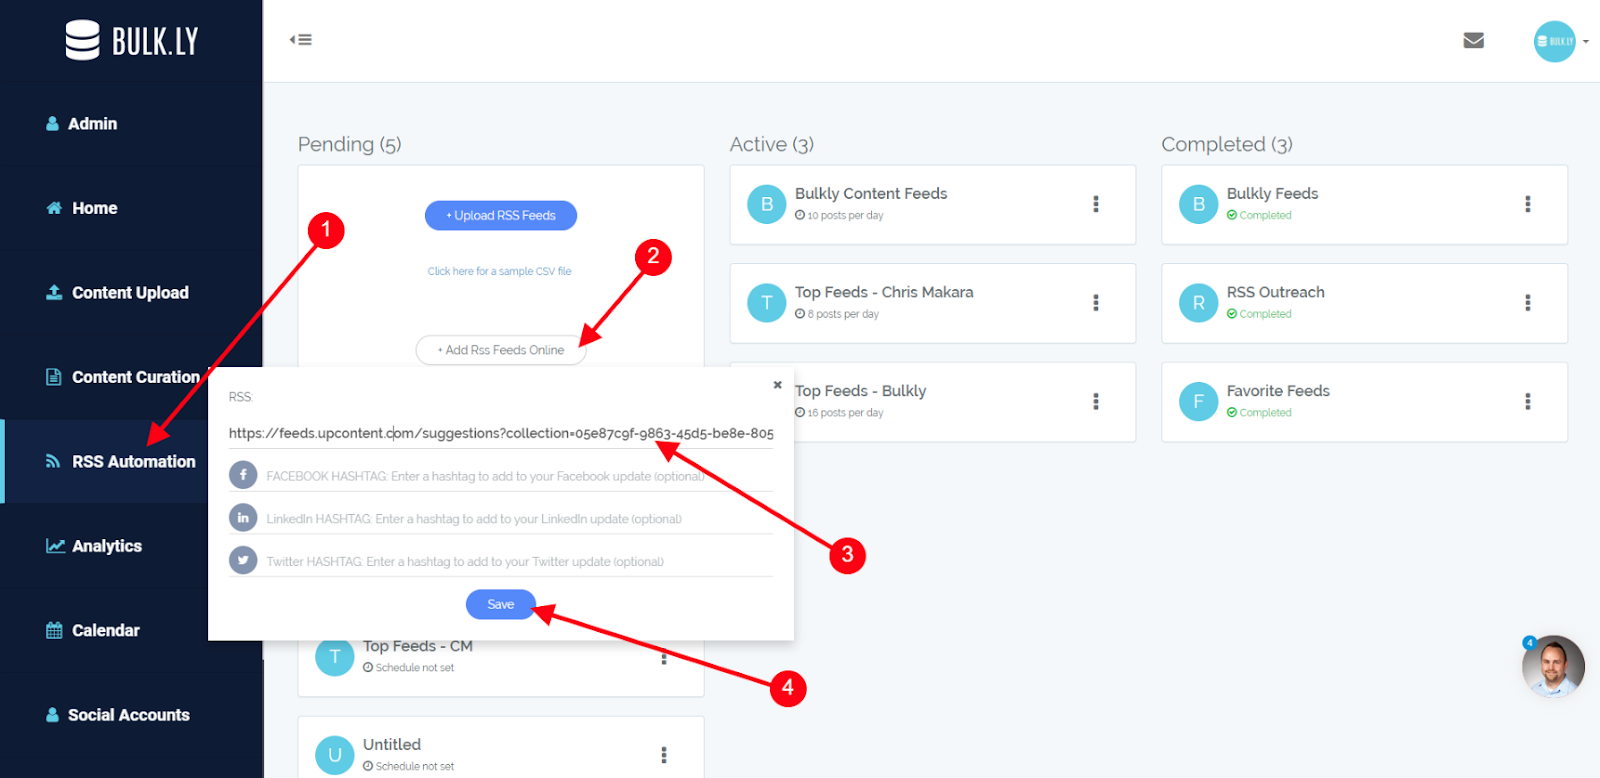
Bulkly is then going to create what is called a group, which is an easy way to keep things organized.
Groups can have multiple RSS URLs in them if you would like, but for this post we will just focus on using one.
You’re just a few clicks away from launching your evergreen social media updates on autopilot, all that is left is to select your settings.
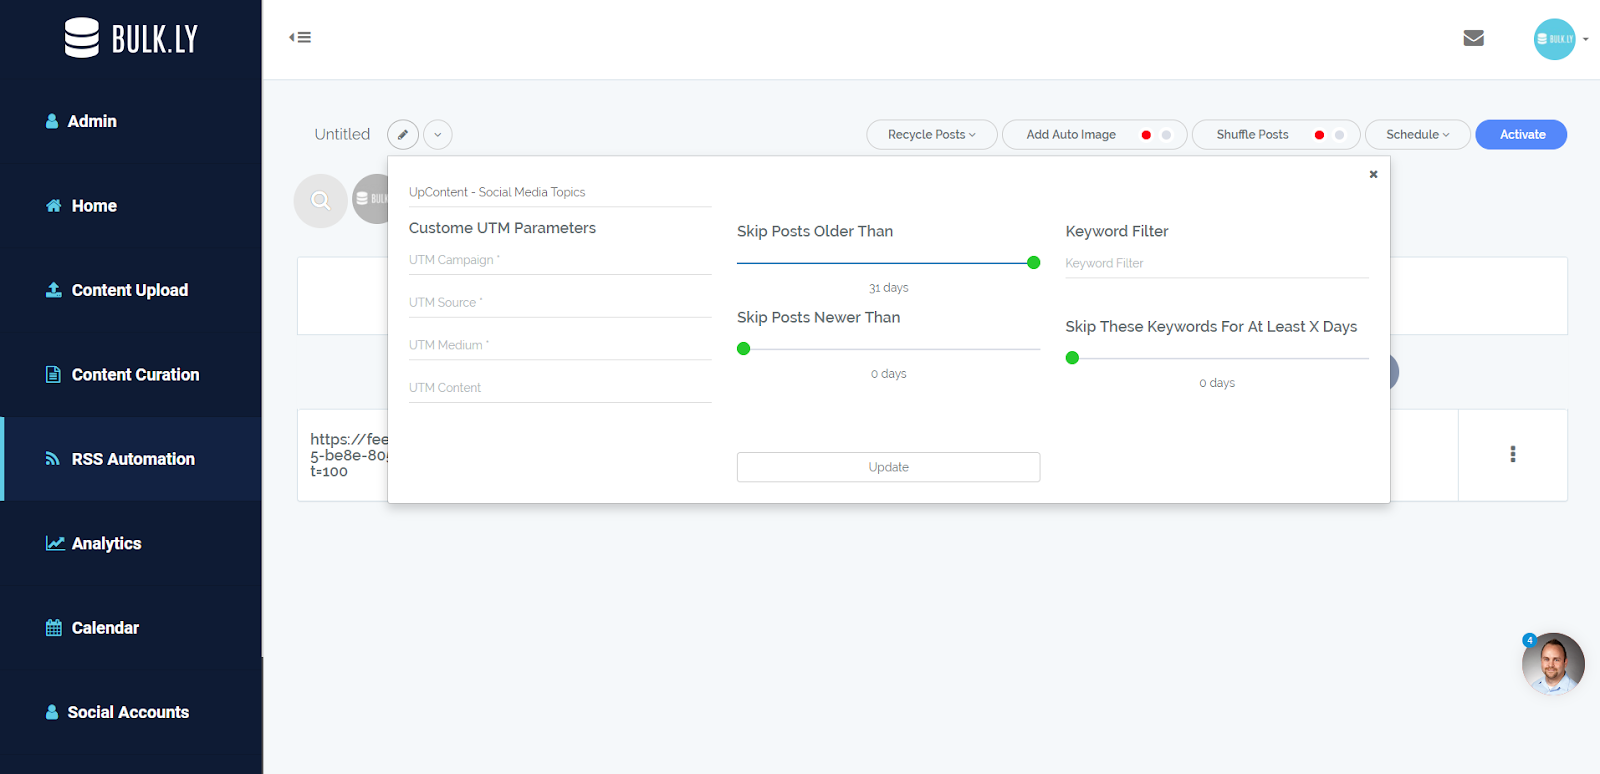
The first thing you will want to do is edit the group name. By default, it will say “untitled”. Simply click on the pencil icon to edit this.
An overlay will appear where you can change the name. For example, I changed the name to “UpContent - Social Media Topics”. You will notice some other settings that you can leave as-is, or tweak as you would like. Be sure to click “update” to save your changes.
Inside the group page you will see all the social media accounts you have connected in your Buffer account. Simply click on the accounts that you want to send updates to from this group.
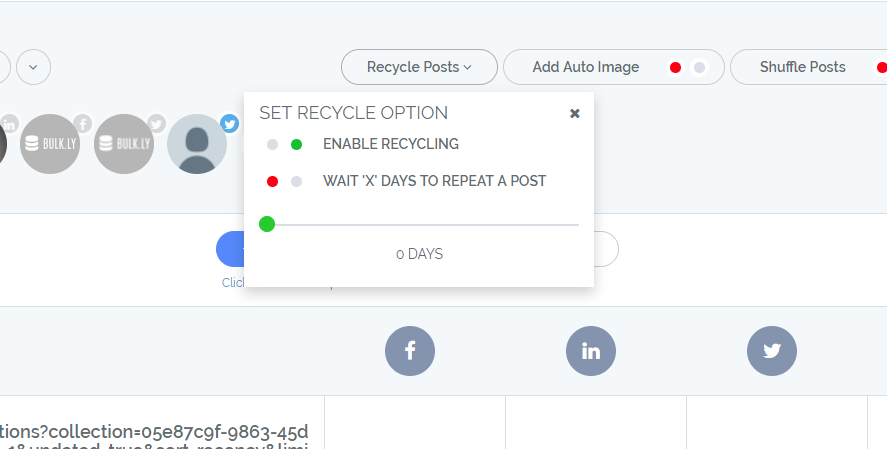
Next, click on the “Recycle Posts” button and then click on the circle to turn on “Enable Recycling”. This needs to be enabled in order to continuously drip updates into your Buffer account.
Additionally, you can enable the “Wait X Days To Repeat a Post” option which will have Bulkly not send the same update to Buffer until at least the amount of days set has passed.
The next option is the “Add Auto Image” feature. When this is enabled, Bulkly will natively attach the image to your social media update instead of relying on the social media channel using Open Graph tags.
“Shuffle Posts” when enabled will randomize the order the posts get sent to your Buffer account.
This can be important to enable should you not want the posts always sent in the same order again and again. Basically, it will help make your stream appear a bit more natural.
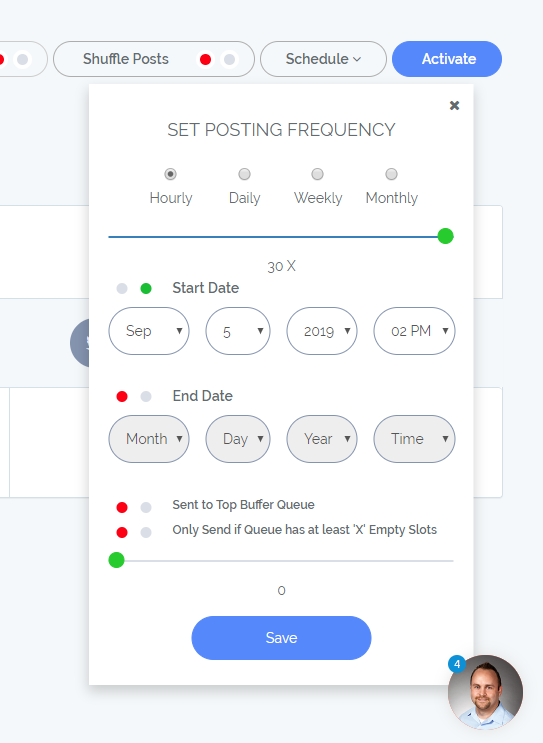
The last option is to set your schedule. It’s important to note that this schedule refers to how often Bulkly sends content to your Buffer account and not how often it will get posted to your social media accounts.
Since the content is added to Buffer, it uses the posting schedule you have set up within Buffer.
In Bulkly, you can choose to post hourly, daily, weekly or monthly.
You can also choose to not start sending posts to Buffer until a certain date while also having the option to stop sending at a certain date. For evergreen content I recommend leaving the default start date (immediately) and have no end date.
An optional setting is the “Send to Top of Buffer Queue” which means these updates will be added at the top of your queue instead of at the end.
And the “Only Send if Queue has at least X empty slots” which means that a post will only be sent to Buffer if there are at least that many available slots for scheduling.
When you’re done with your schedule, click save.
All that’s left is to click on the “Activate” button to start dripping the content into your Buffer account according to your settings.
And depending on your settings, the content will start appearing in your Buffer queue automatically.
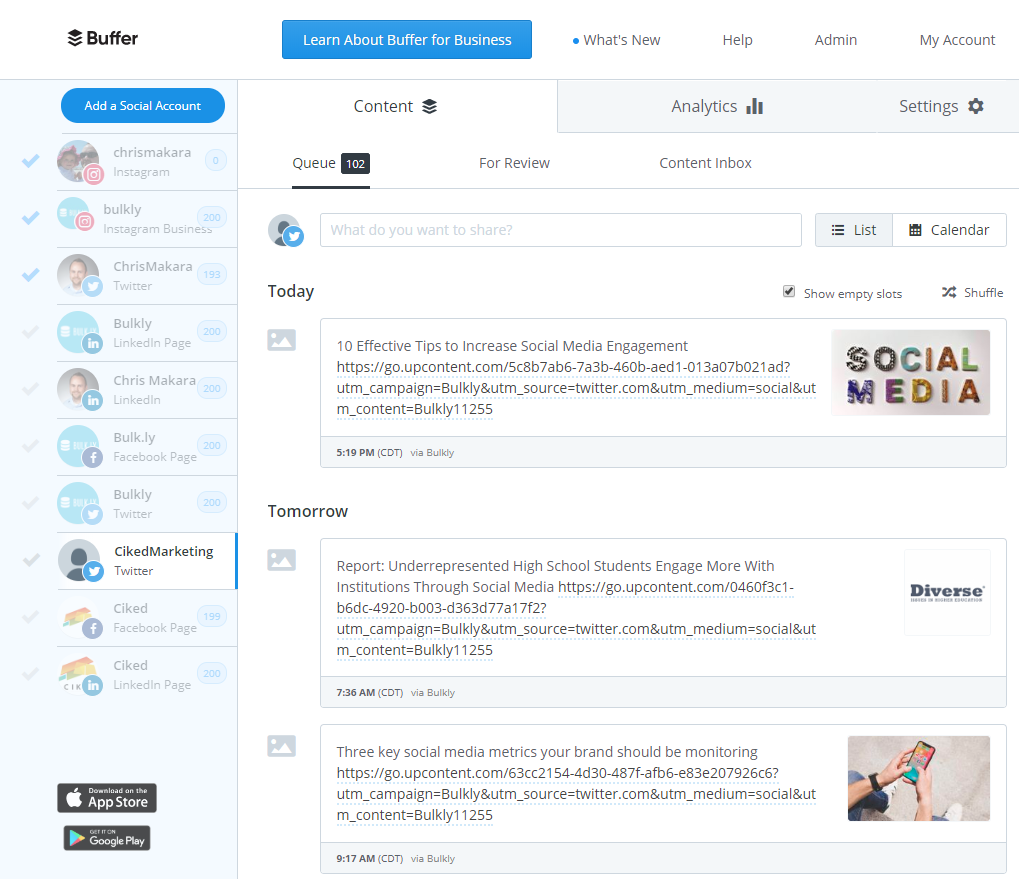
Prefer Watching Me Do This in Real Time?
No worries, I made a video that walks you through this entire process.
Be Smarter With Your Time Spent on Social Media
As I mentioned earlier, you only have so much time in a day.
You need to be efficient at how you use it.
If you’re haphazardly scrambling everyday to find something to share on social media, then taking a few minutes to build out a strategy to recycle social media updates will be time well spent.
This curated content will automatically drip into your social media accounts for you.
And moving forward, you’ll have more time to spend on things that matter to you and/or your business.
But you don’t have to stop with curating content of others. You can and should apply this same concept with your own content.
In the end you’ll be able to balance the amount of self promotional content you share with your curated updates, giving you a balanced approach for your social media updates.
Best of all, you’ll be able to have a fully automated social media posting schedule.
One thing to note is that just because you are automating your scheduling and publishing doesn’t mean you completely abandon the monitoring of your social accounts.
You’ll still need to listen and respond to mentions on your social channels. But lucky for you, you’ll now have more time each day that has been freed up from automating your posting so you can engage more with your audience.
Chris Makara is the founder of Bulkly, a social media automation tool for individuals and small businesses. Since 2003, Chris has develpped a broad digital marketing background with a focus on SEO, Social Media, Automation and Analytics.